Android: Configure e-mail accounts
Android's e-mail app permits you to receive and send emails using the e-mail accounts created under your own domain. Configure it is very easy, simply follow the following steps:
- This guide has been created for Android 4.0 (ICS), if you have an older Android version the options could change, but it's very similar.
- Create your e-mail account, follow this steps to do it: How do I create email accounts?
- Now that you have you own e-mail account go to your Android's Mail app. The following screen will appear:
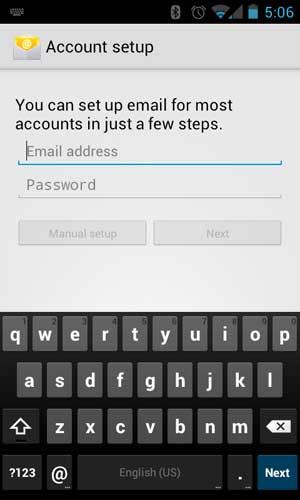
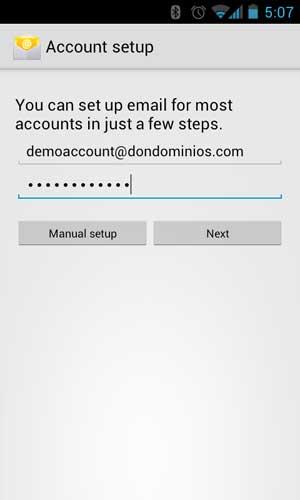
- Write your complete email account and the password you chosen. Press Next:
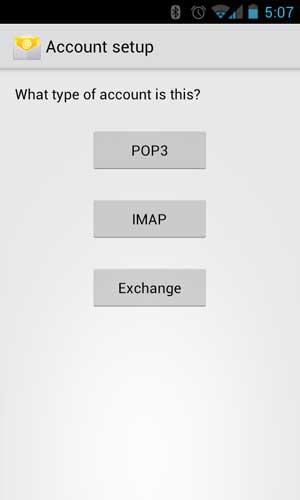
- Press the "IMAP" option, so when you read an email with your Android smartphone, the mail will not be deleted from the server and you'll be able to read it from other devices.
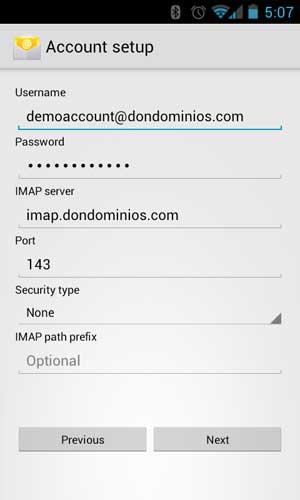
- Configure the incoming server: Write again your complete e-mail account and the password, as IMAP server you must write "imap.yourdomain.com" (changing yourdomain.com with your registered domain), press "Next".
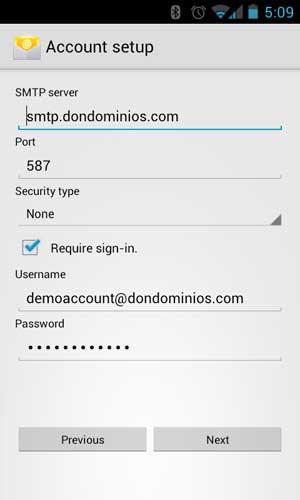
- Configure the outgoing server: In "SMTP server" you must write "smtp.yourdomain.com" (changing yourdomain.com with your registered domain), mark the option "Require sing-in" and write again your complete email address and password. Press "Next".
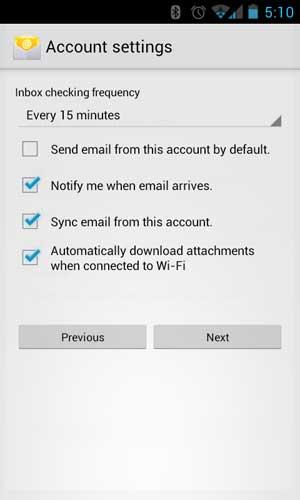
- Your smartphone will check the data you wrote and if all is ok you'll be able to select the Inbox checking frequency. Press "Next".
- Finally write the name you want to appear when sending your emails and press again "Next".
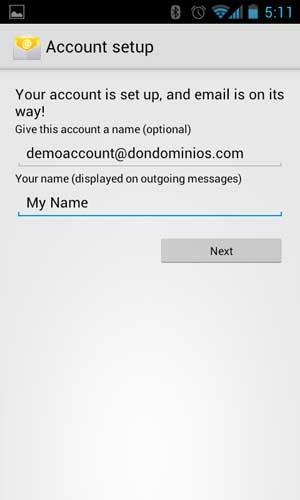
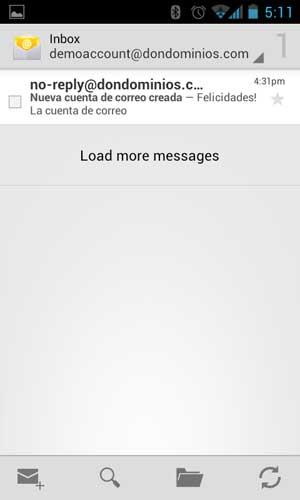
- That's it! You completed the configuration of your email account on your Android smartphone and in a few minutes the first emails will appear.**