Create an e-commerce on WordPress with WooCommerce
WooCommerce is the most used plugin to create an e-commerce on WordPress.
In this guide you will learn how to install WooCommerce and to do the initial configuration. To find and install the plugin you can follow the steps of this guide: "How to install a plugin".
Once installed you will see the WooCommerce assistant to do the initial configuration.
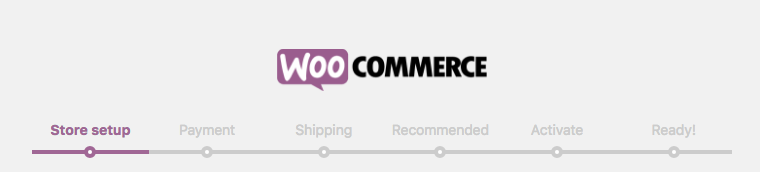
Step 1. Store setup
The first data we need to introduce are the store address, the currency that you accept and the type of products you sell: physical, digital or both.
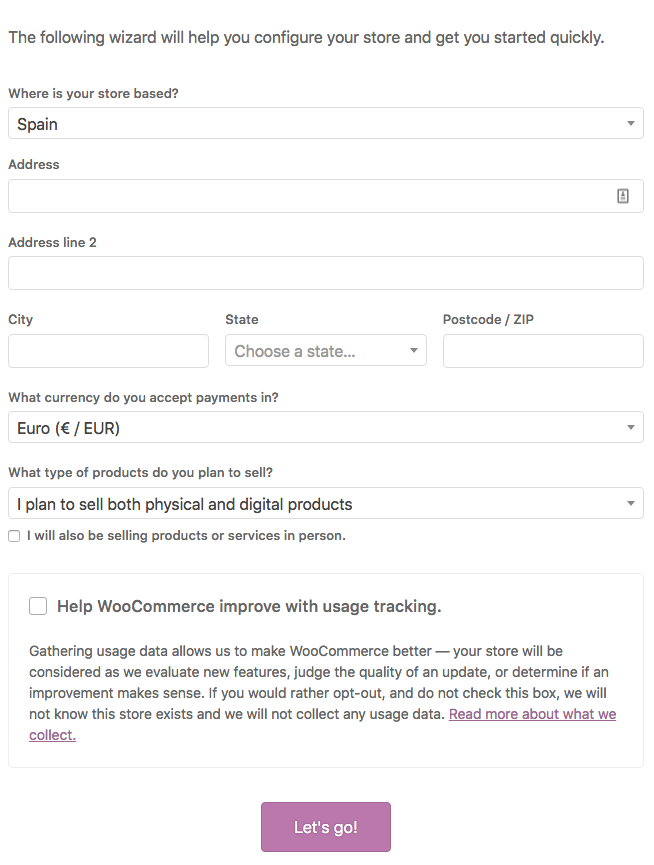
You will also have have two additional options: I will also be selling productos or services in person., this option will activate some additional parameters to adapt your e-store, and the other option is Help WooCommerce improve with usage tracking. with this option enabled you will send some data to the WooCommerce servers to help them improve the plugin.
Now click the Let’s go! button to continue.
Step 2. Payment
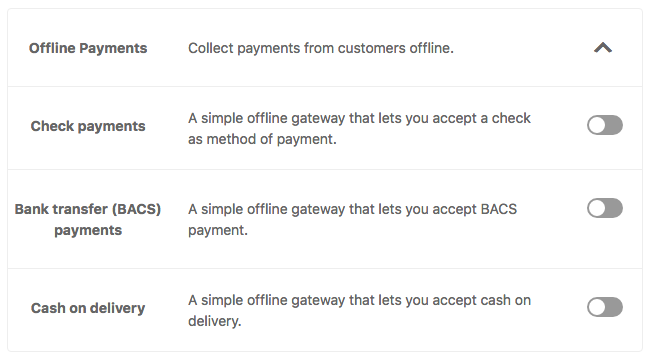
By default WooCommerce will offer you the option to enable Stripe, Paypal and Offline Payments as payment methods.

If you open the “Offline Payments” dropdown menu you will find the offline options.
Choose the payment methods you want use on your e-commerce and click Continue.
Step 3. Shipping
Now you can choose the countries where you will send your products, if there is any cost and the type of unit you will use on your store.
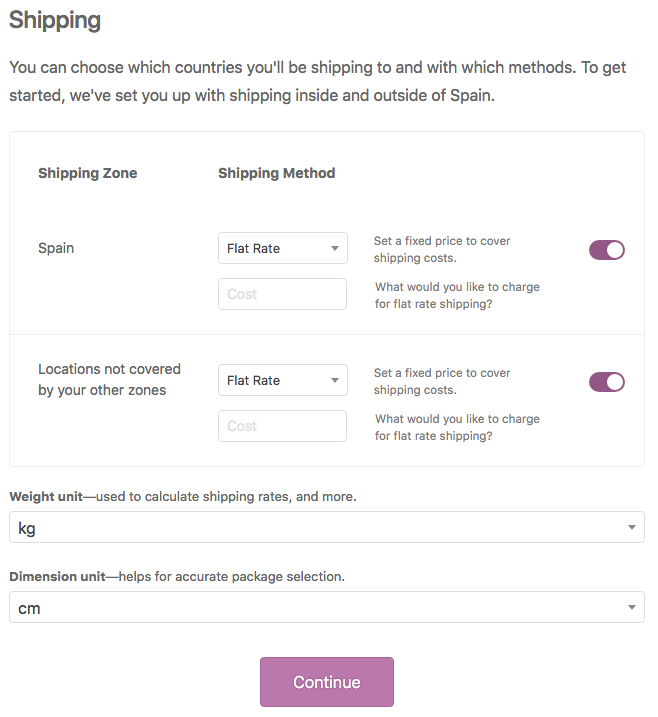
The dropdown menu Flat Rate allows you to define if the shipping have any cost or it is free and with the right-sided button you can enable/disable the shipping option.
The others dropdown menus Weight unit and Dimension unit defines the unit you will use on your products.
After select all as you want click Continue.
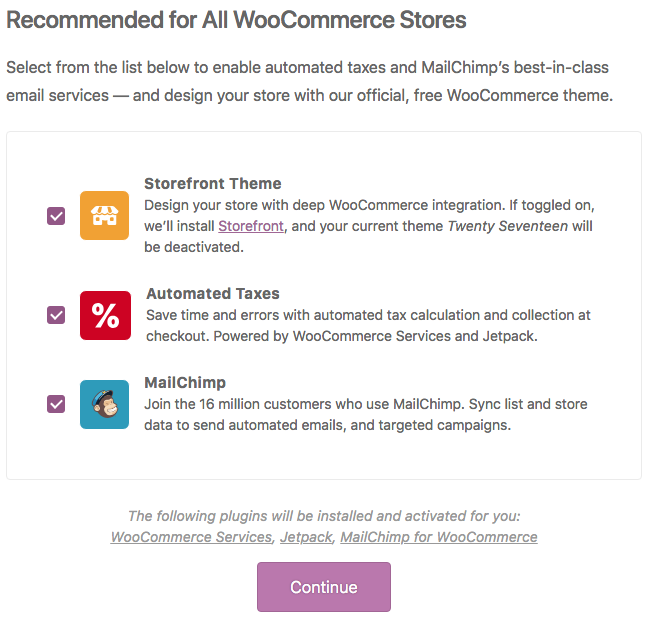
Step 4. Recommended
WooCommerce will offer you tree additional plugins for your store:
- “Storefront Theme: is the default WooCommerce theme, if you enable it your current theme will be disabled.
- “Automated Taxes: this plugins will calculate the taxes amount.
- “MailChimp: is one of the most used services to send newsletters and e-mail marketing.
Choose the additional services you want use and click Continue”.
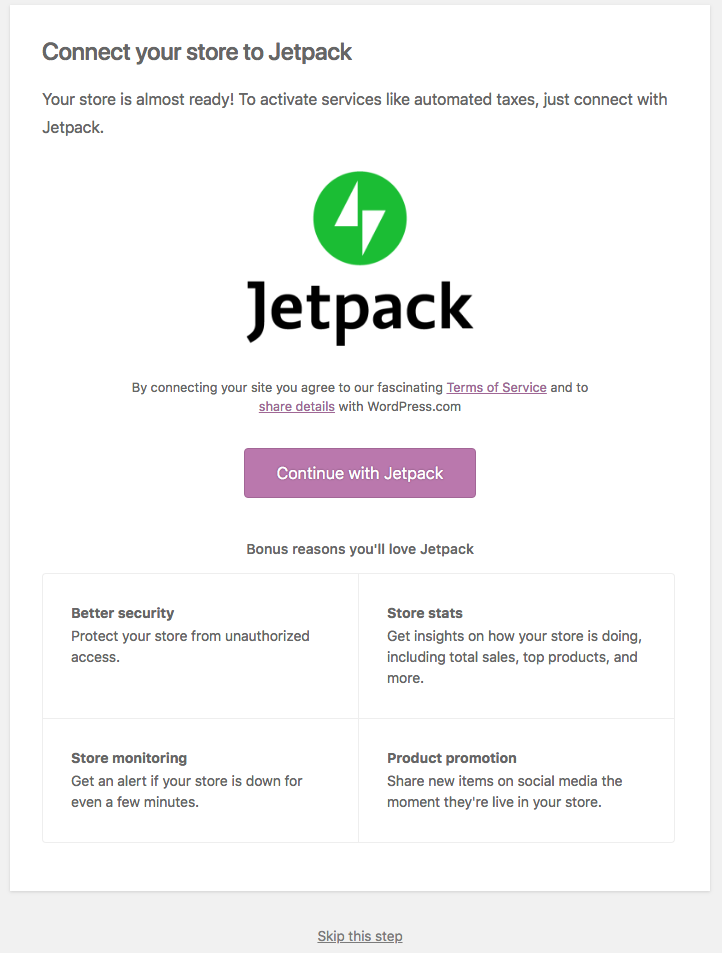
Step 5. Activate
Now WooCommerce offers you to activate Jetpack, if you want use it click Continue with Jetpack else you can click the bottom link Skip this step.
If you enable the plugin it will request to create an user account at the Jetpack site.
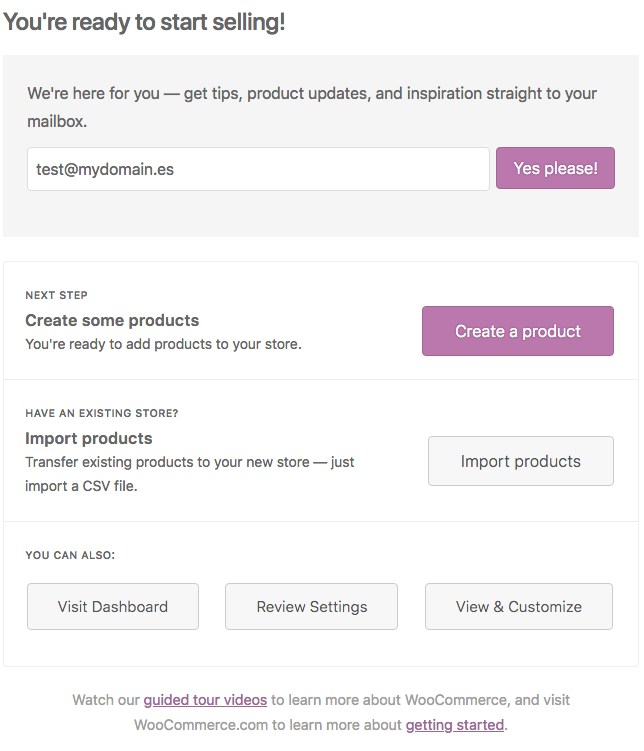
Step 6. Ready!
You have finished the WooCommerce installation and initial configuration. Now you can start to create or import products, create categories, etc.