


WordPress: How to remove malware
WordPress is one of the most used CMS to create websites and blogs because it is easy to use and adaptable to almost any kind of website. For this reason there are constantly malicious parties searching vulnerabilities, that vulnerabilities may appear when we use an old WordPress/plugin/theme version that is publicly known that it doesn't have fixed a vulnerability or by the use of a plugin/theme premium downloaded from a unofficial source. This vulnerabilities are used later by hackers to do phishing attacks (redirecting the visitors to fake bank websites, for example), or even use the website to infect other sites, etc.
In this guide we’ll explain you how to remove malware from WordPress.
Next steps will be useful most times to remove the malware from your WordPress installation, but some malware infections may require additional actions to be solved.
Step 1. Check your computer
Your WordPress may be infected by many causes such as a WordPress vulnerability, an outdated theme or plugin, etc. but also it can be because someone get your WordPress or FTP access password due to an infection of one of your computers or devices.
The first step is to check the computers from where you access to your WordPress using an antivirus or antimalware.
Step 2. Change the FTP password
Now your computer is secure and you can proceed to change your FTP password. You can change the FTP password following this guide.
When you create the new password be sure you’re not using a repeated o insecure password. There exists some tools that can help you to create secure passwords, for example LastPass.
Step 3. Download the latest WordPress version
Each WordPress update bring you a more secure tool, where some bugs and vulnerabilities are fixed. It’s really important maintain your WordPress updated always at the latest available version. As we want use it, we will download it from the WordPress official page. A compressed file will be downloaded, you will have to uncompress the folder to see the WordPress files.
Once downloaded and uncompressed you will let this on stand by for now.
Step 4. Clean the infection
You have to connect to your hosting via FTP. You can use the WebFTP tool available into FTP Accounts into your hosting management area or use an external FTP client as: Filezilla, cuteFTP, etc.
After accessing through FTP you have to move into your WordPress folder. By default our hosting install WordPress into the /public/ folder, if you’ve not changed it or installed it into a subdomain or subfolder you’ll find it there.
You’ll find a list of files and folders like this:
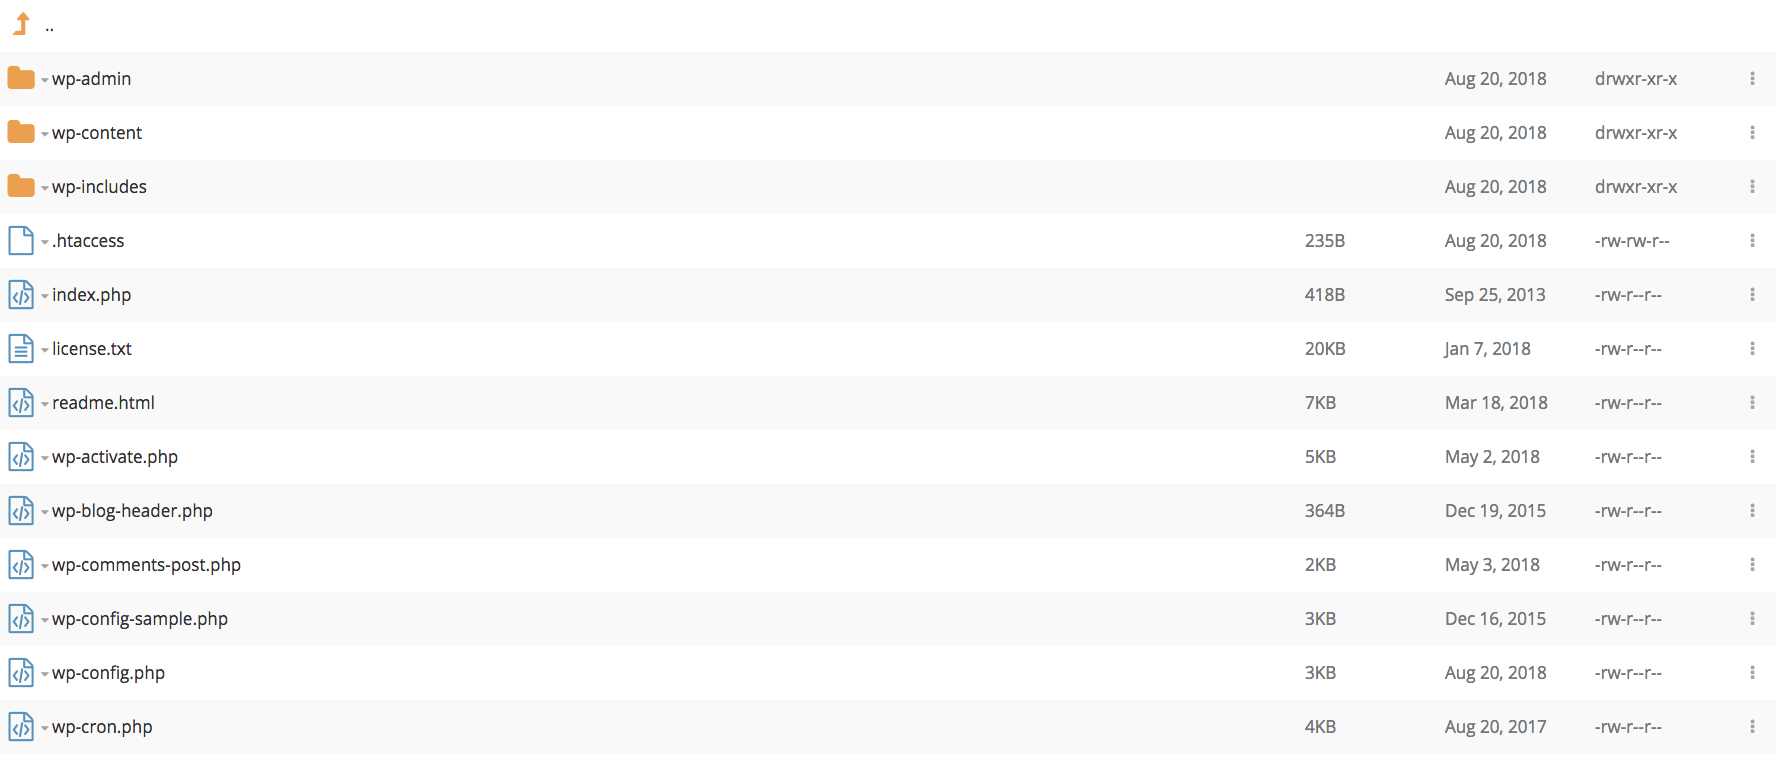
Delete all files and folders EXCEPT the “wp-config.php” file and the “wp-content” folder.
Now you have to open (edit) the wp-config.php file to be sure it’s not infected by malware. You can find the Edit option by right-clicking the file:
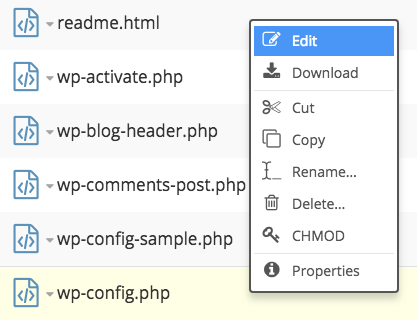
After clicking Edit you’ll see the source code so be careful to not do any accidental change or it may be broken.
We recommend you to compare your wp-config.php with the wp-config-sample.php downloaded before from the WordPress official page. If your wp-config.php is infected you’ll probably find a large character chain which won't appear in the wp-config-sample.php file.
With the wp-config.php file checked and cleaned it’s time to check the wp-content folder. Enter it and open the “plugins” folder, make a list of the plugins you’re using and then delete them.
After that do the same with the folder themes.
Finally check if the folder ”uploads has any executable files inside, should you find anyone check the source code and if it contains malware, remove it.
Step 5. Upload WordPress
You have to upload via FTP the Wordpress files and folders that you have downloaded before (step 2), you can do it following this guide. Remember to install the plugins and themes you have deleted.
After the WordPress restoration change your passwords.
Step 6. Remove the Google warning
The last step is to request Google to remove their warning page (if it appears). In order to do that request you have to login a Google Search Console, add your website and click on Security problems. Now follow Google's steps to proceed with the delist request.